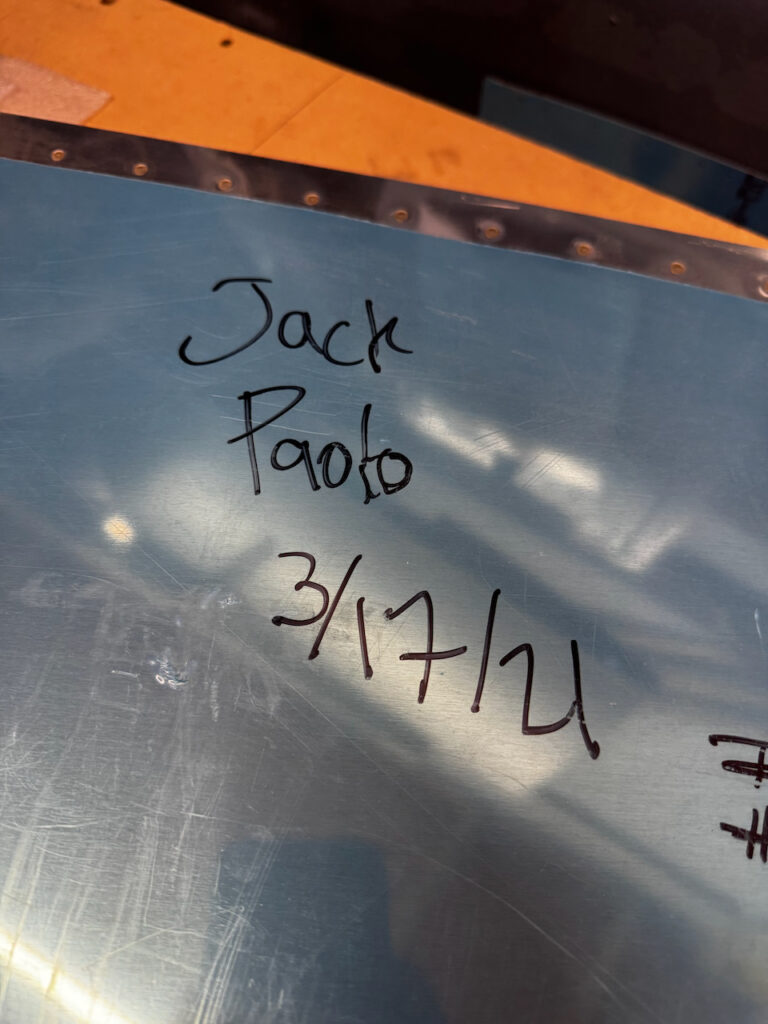
It was a trip to see this scribbled on the top of the Horizontal Stabilizer (HS).
“Jack Paolo 3/17/21”.
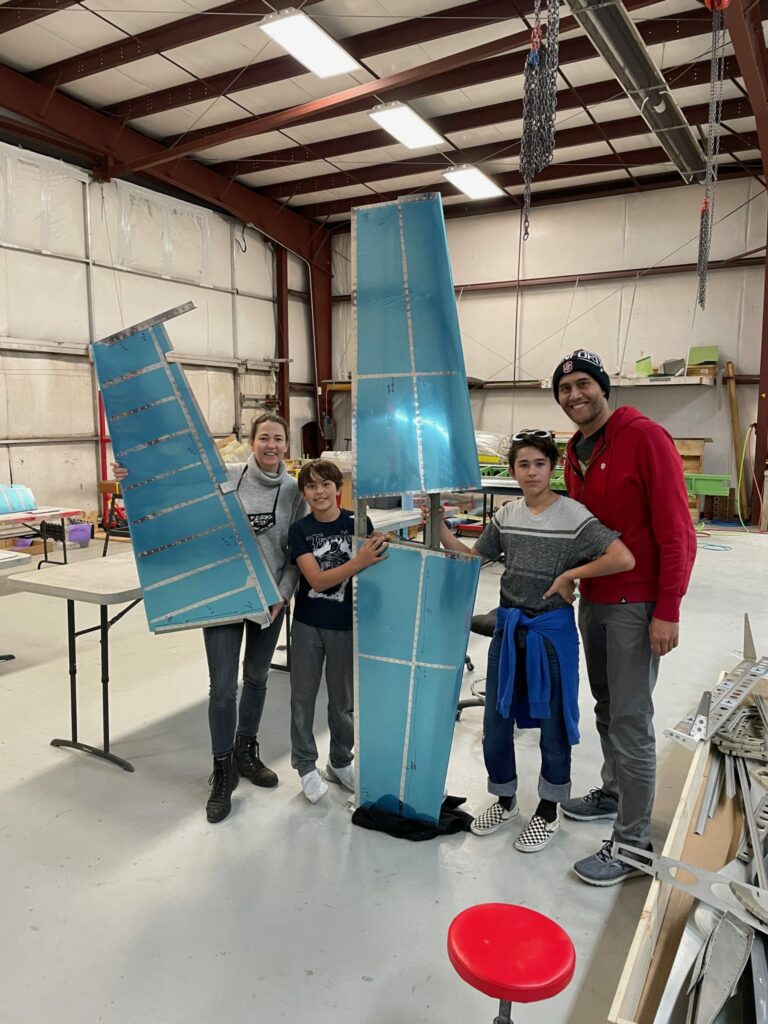
It’s been almost exactly 3.5 years since Jack and I finished the HS up in Oregon. It spent nearly 2 years up in Oregon in storage, and then in my hangar attic for another 1.5 years… but now it’s back to being the main character as I start to attach the “feathers” to the fuselage! Here’s a throw back photo from that original trip that started it all (I promise jack was happier than the photo implies!).
Look how young we all look!
So it’s time to attach the HS right? NOPE! I forgot that there is a service bulletin that was released after I got my HS built that mitigated some cracking in the outboard elevator hinges. The Service bulletin calls for inspection and repair work if you see cracks. Since my plane hasn’t flown, there obviously weren’t any cracks, but the SB also gives you the option of adding the doublers preemptively. Since the access was as easy as it would ever get, I figured might as well do it. Besides…. how hard could it be? 😀
Well… for the most part it was relatively straight forward. Drill out the old hinge brackets, drill out some top rivets (I’ve gotten good at that!), then add a doubler plate and put everything back together. Then I hit the Cherry Max Rivet part… this is a special type of rivet used for significant structural components (for example the hinges that hold the elevator on!). There are fairly strict procedures to install them, and inspection of some of my squeezes reveal less then ideal outcomes. It’s not clear if I should drill them out, or leave as is (see the photos below for examples of each). I’m going to chat with Van’s on Monday to see what the path forward is. In the meantime, I’ve ordered some additional rivets in case that’s the route I need to go down. Below are some shots from the progress:
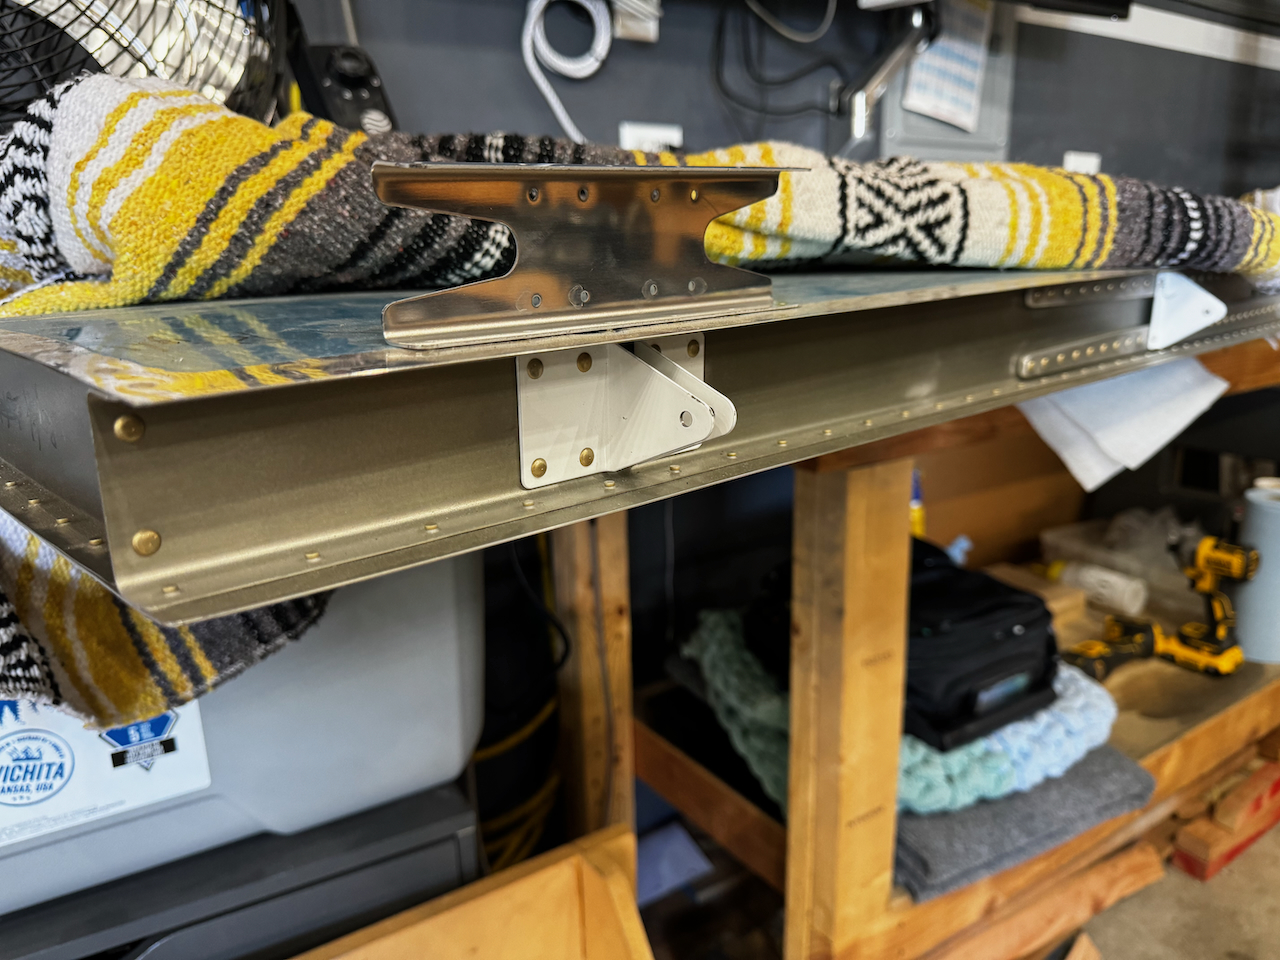
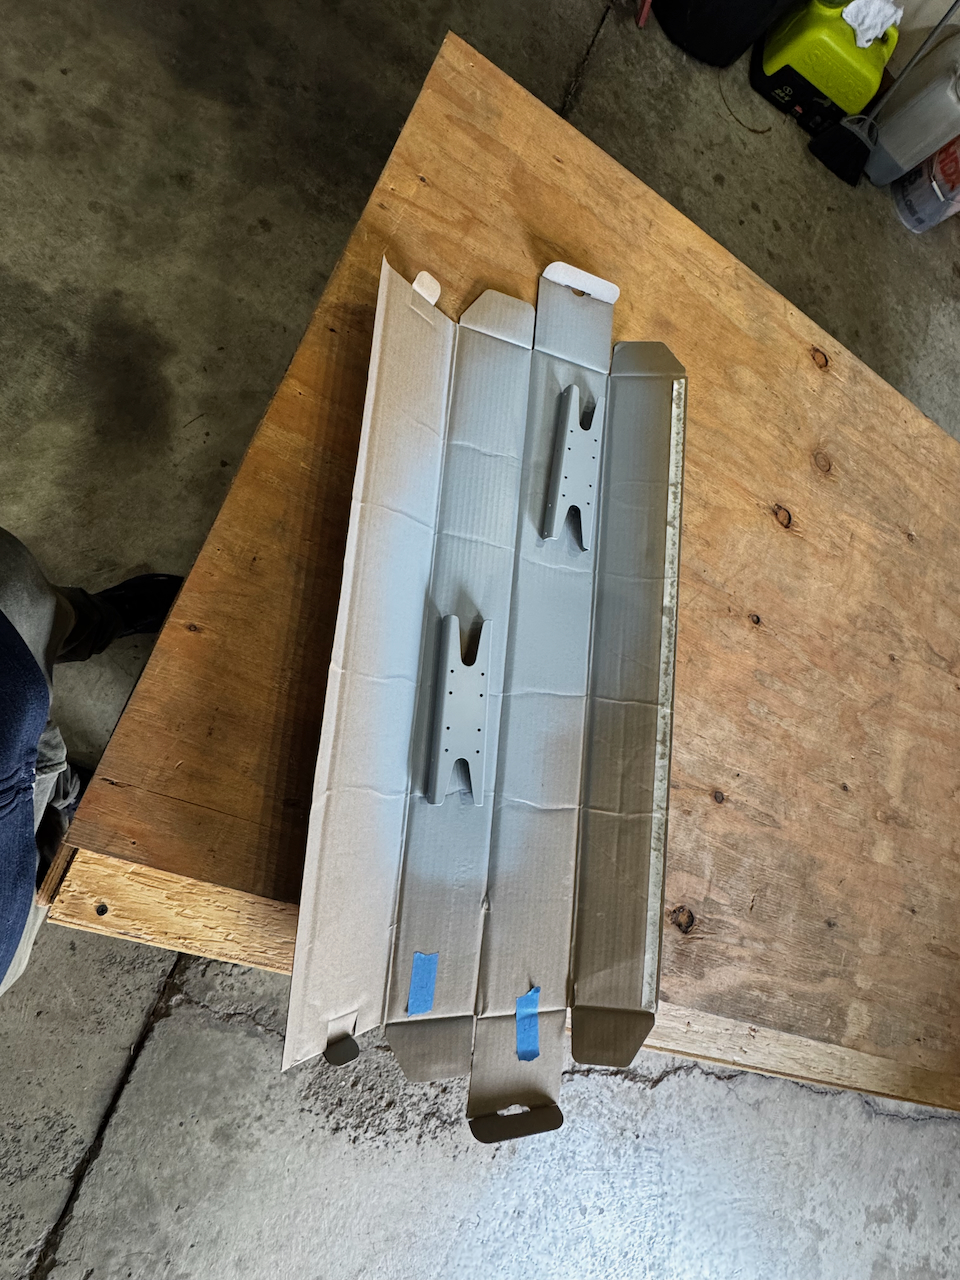
old hinge brackets, and the doubler that needs to go behind them.
I’ve definitely perfected the art of drilling out rivets!
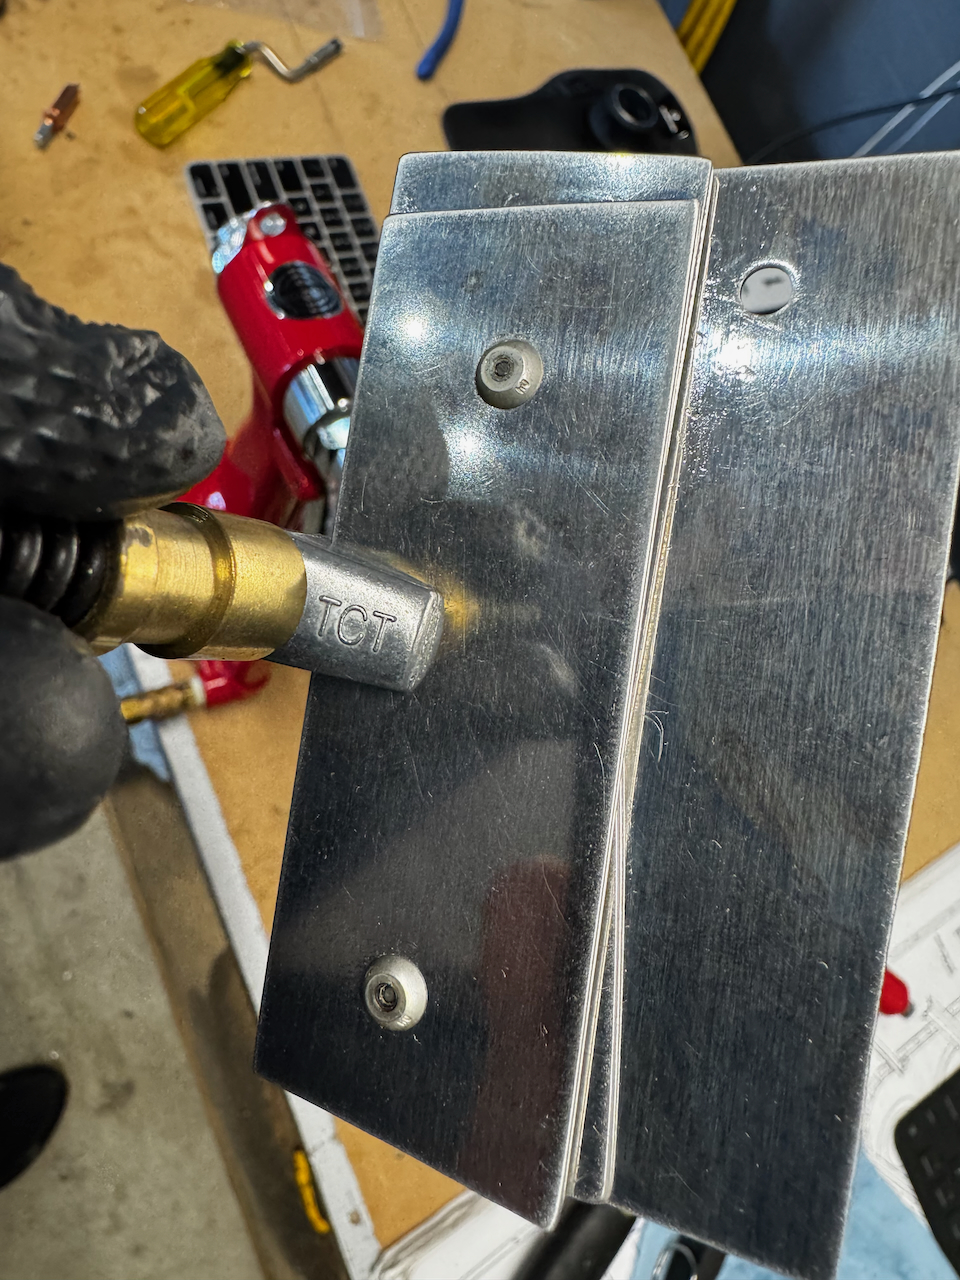
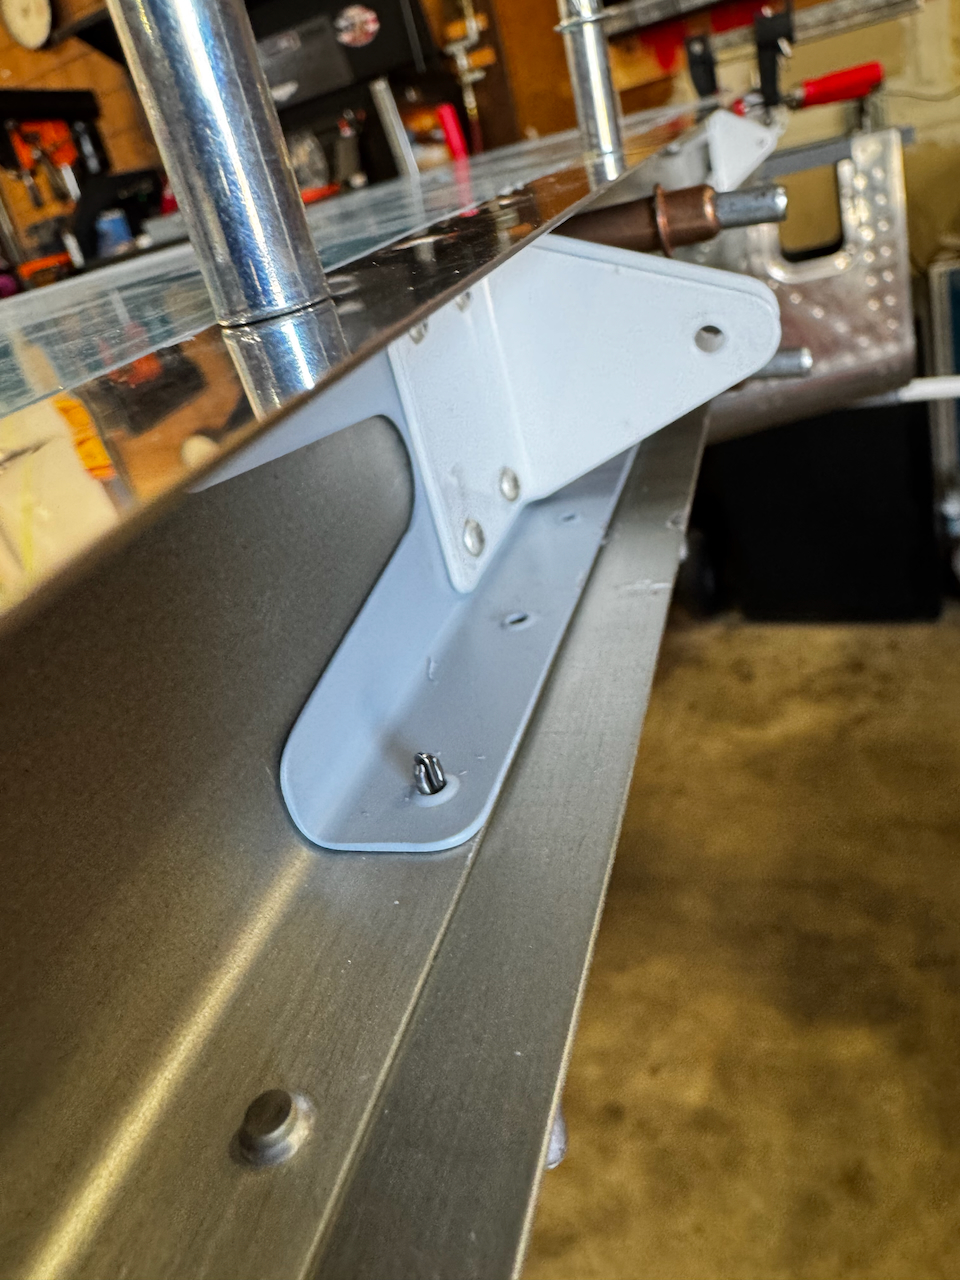
New hinge brackets with doubler in place.
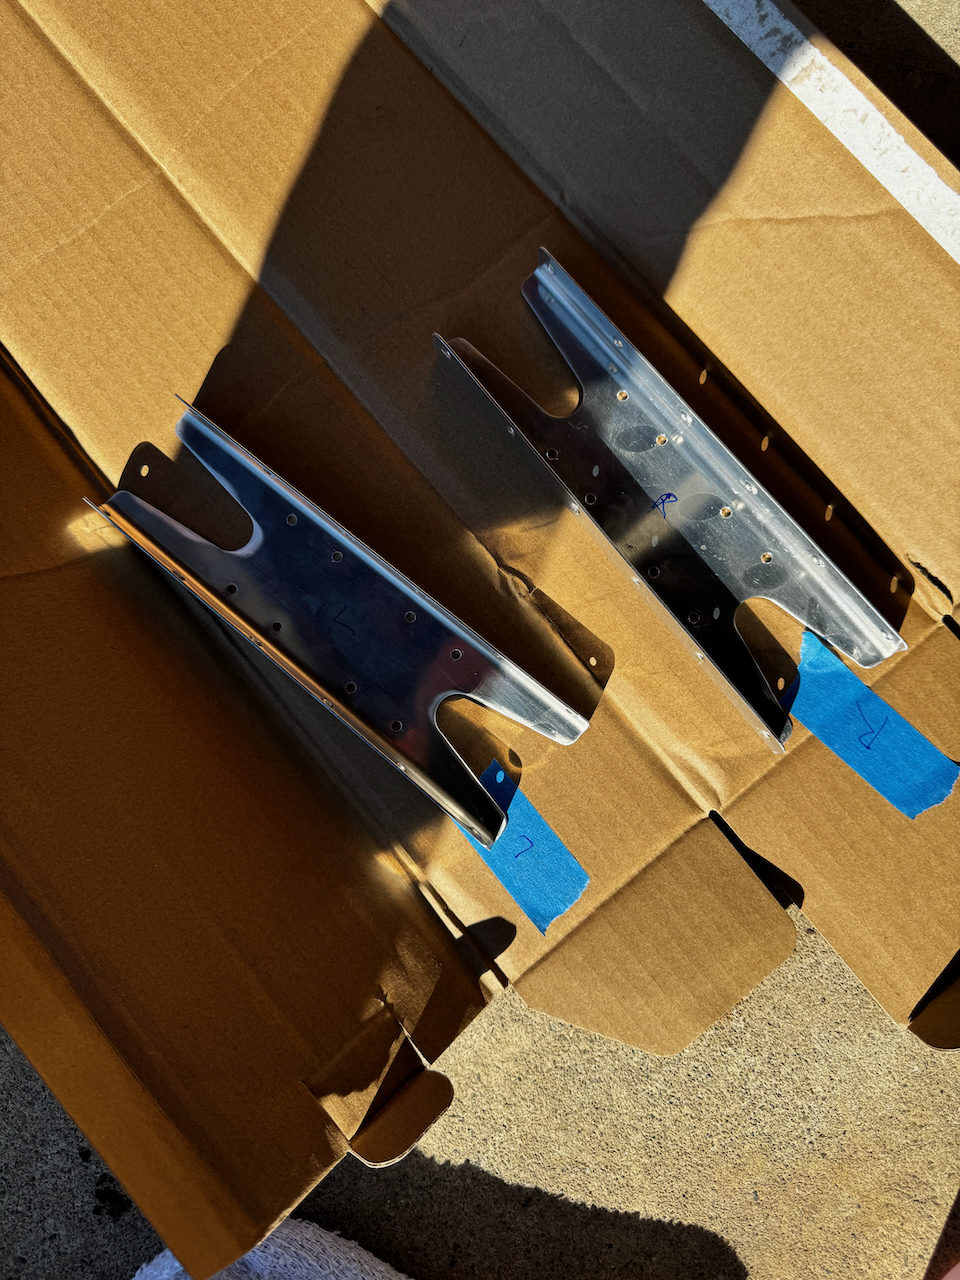
Time to prime! Don’t forget which is left and right
I went with spray can primer for this one.
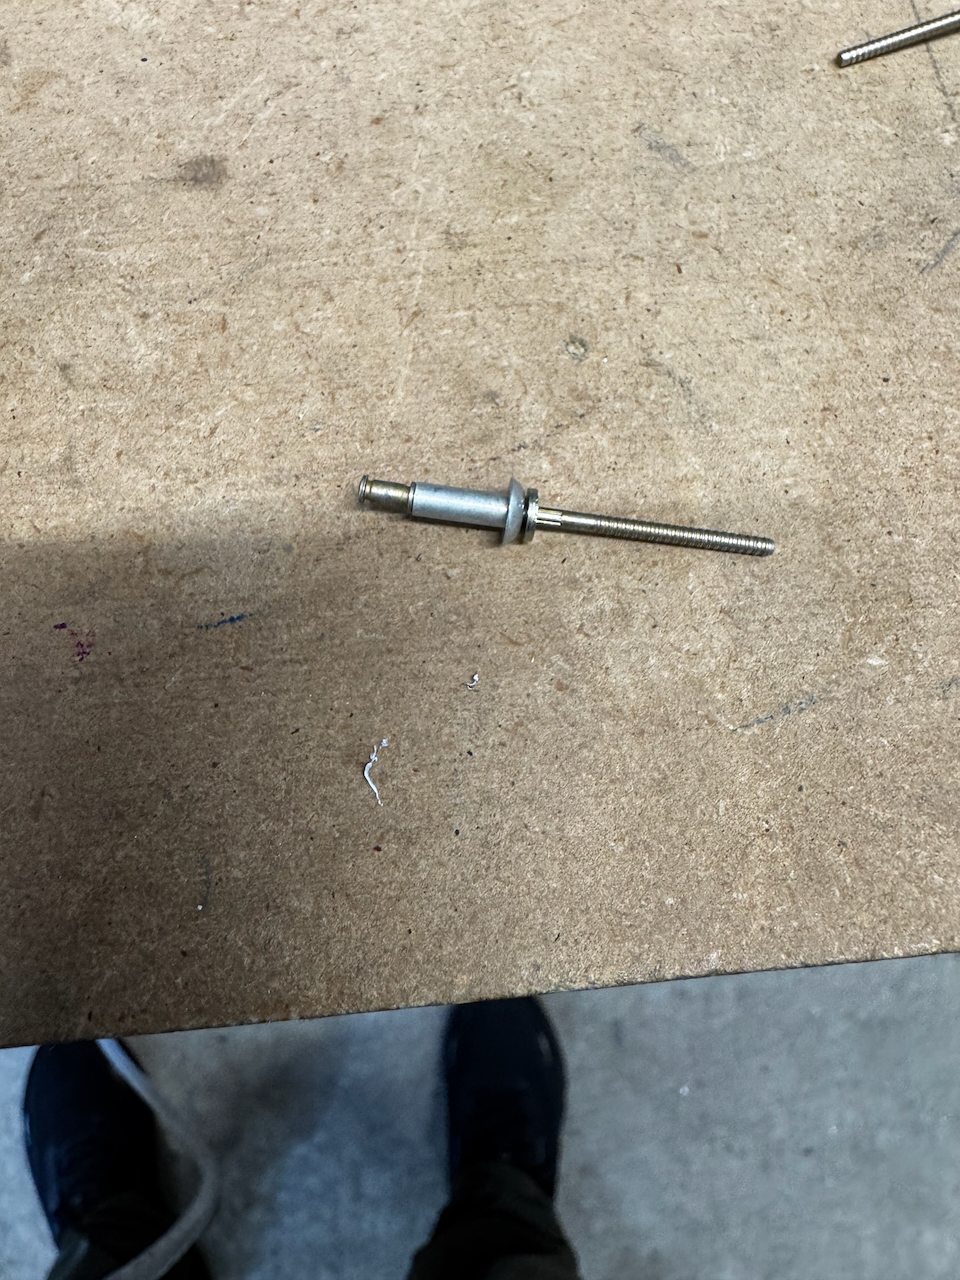
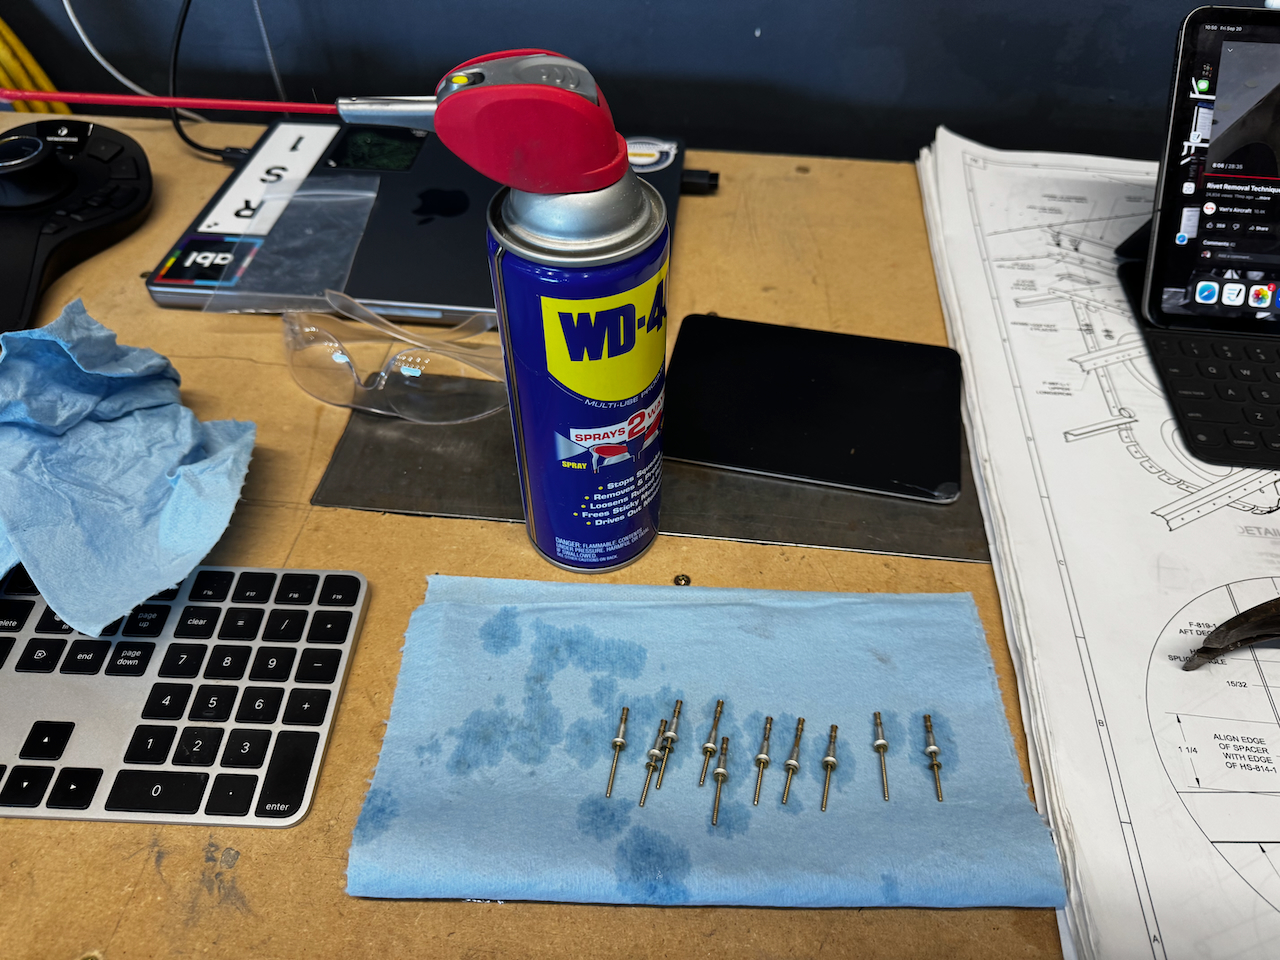
the infamous cherry max rivet.
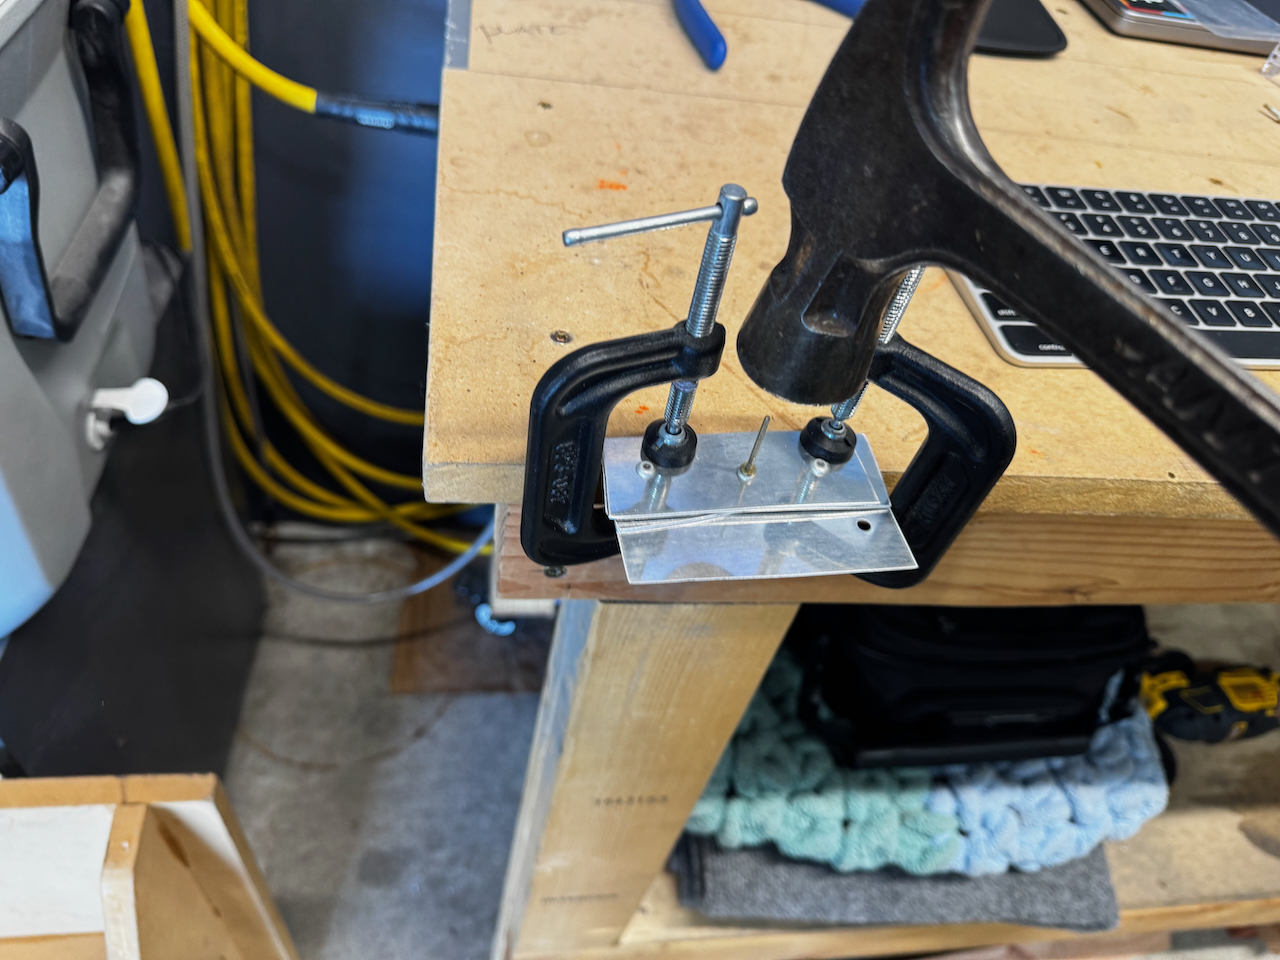
I had to build out a jig to follow the lubrication process.
using the jig to separate the mandril from the rivet.
All lubricated and ready for reassembly.
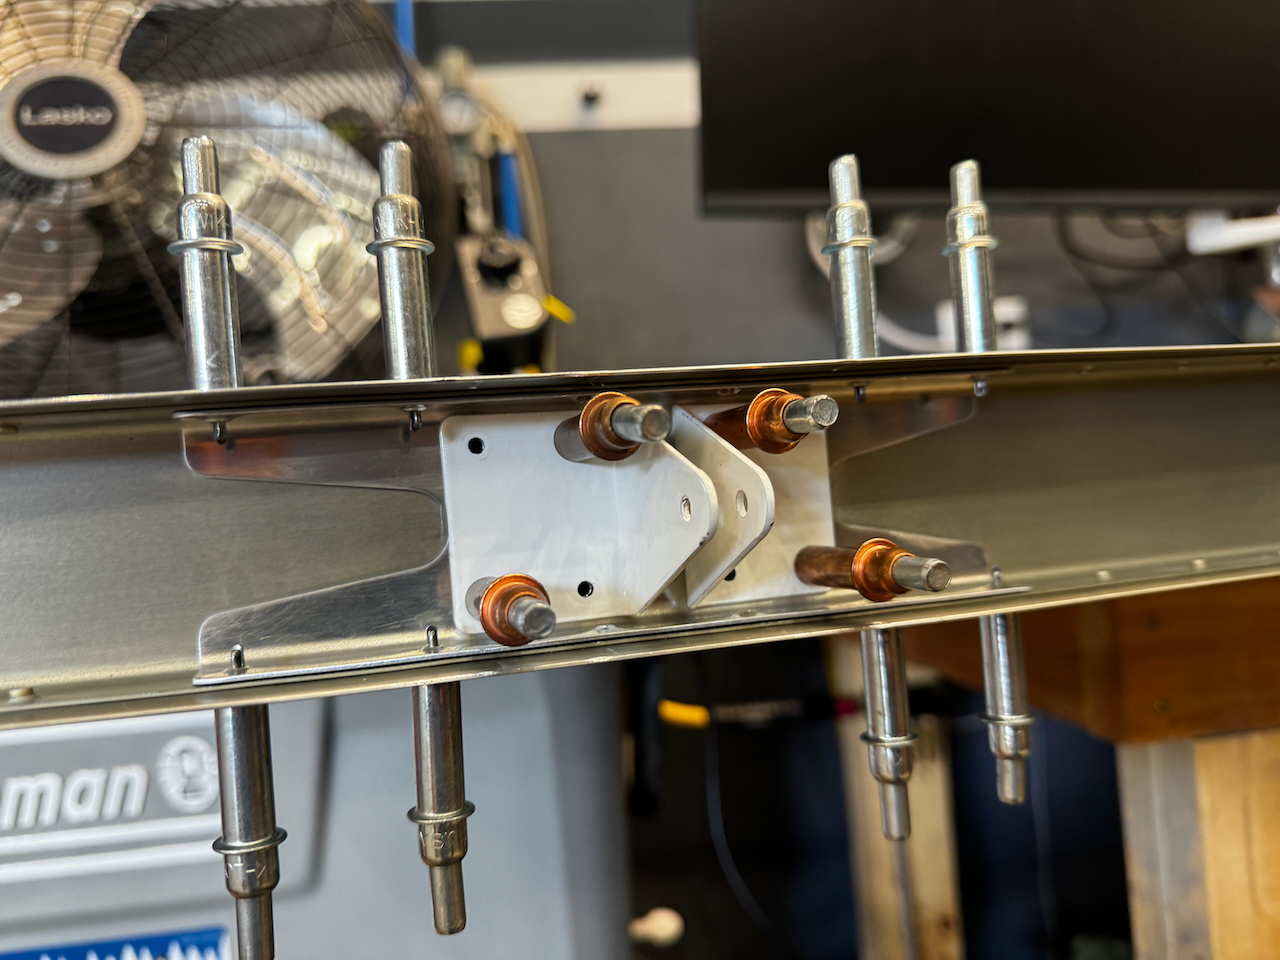
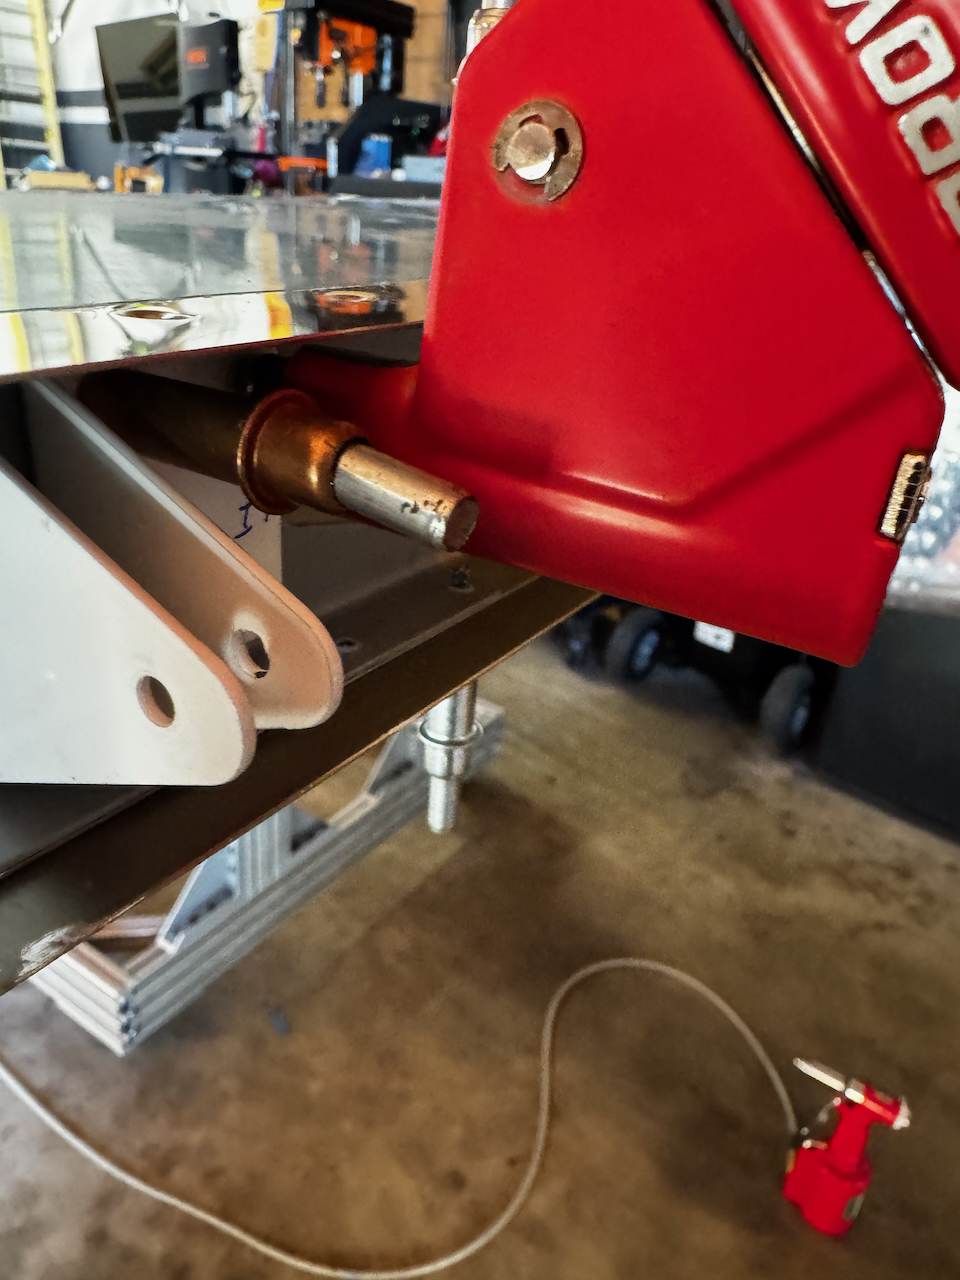
first set of cherry maxes in.
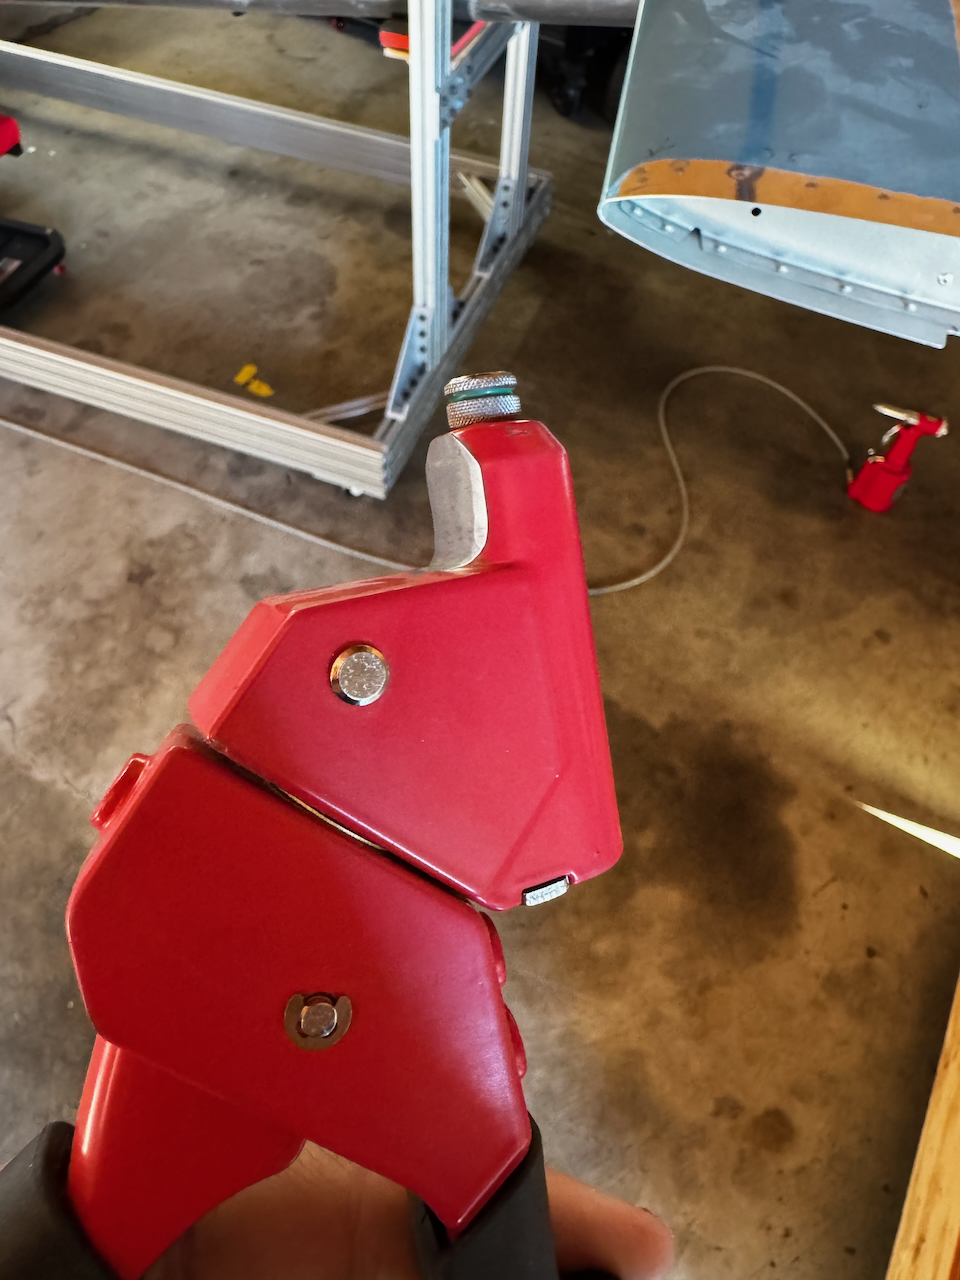
I had to modify the rivet squeezer to fit into the tight confines
works well with the modification.
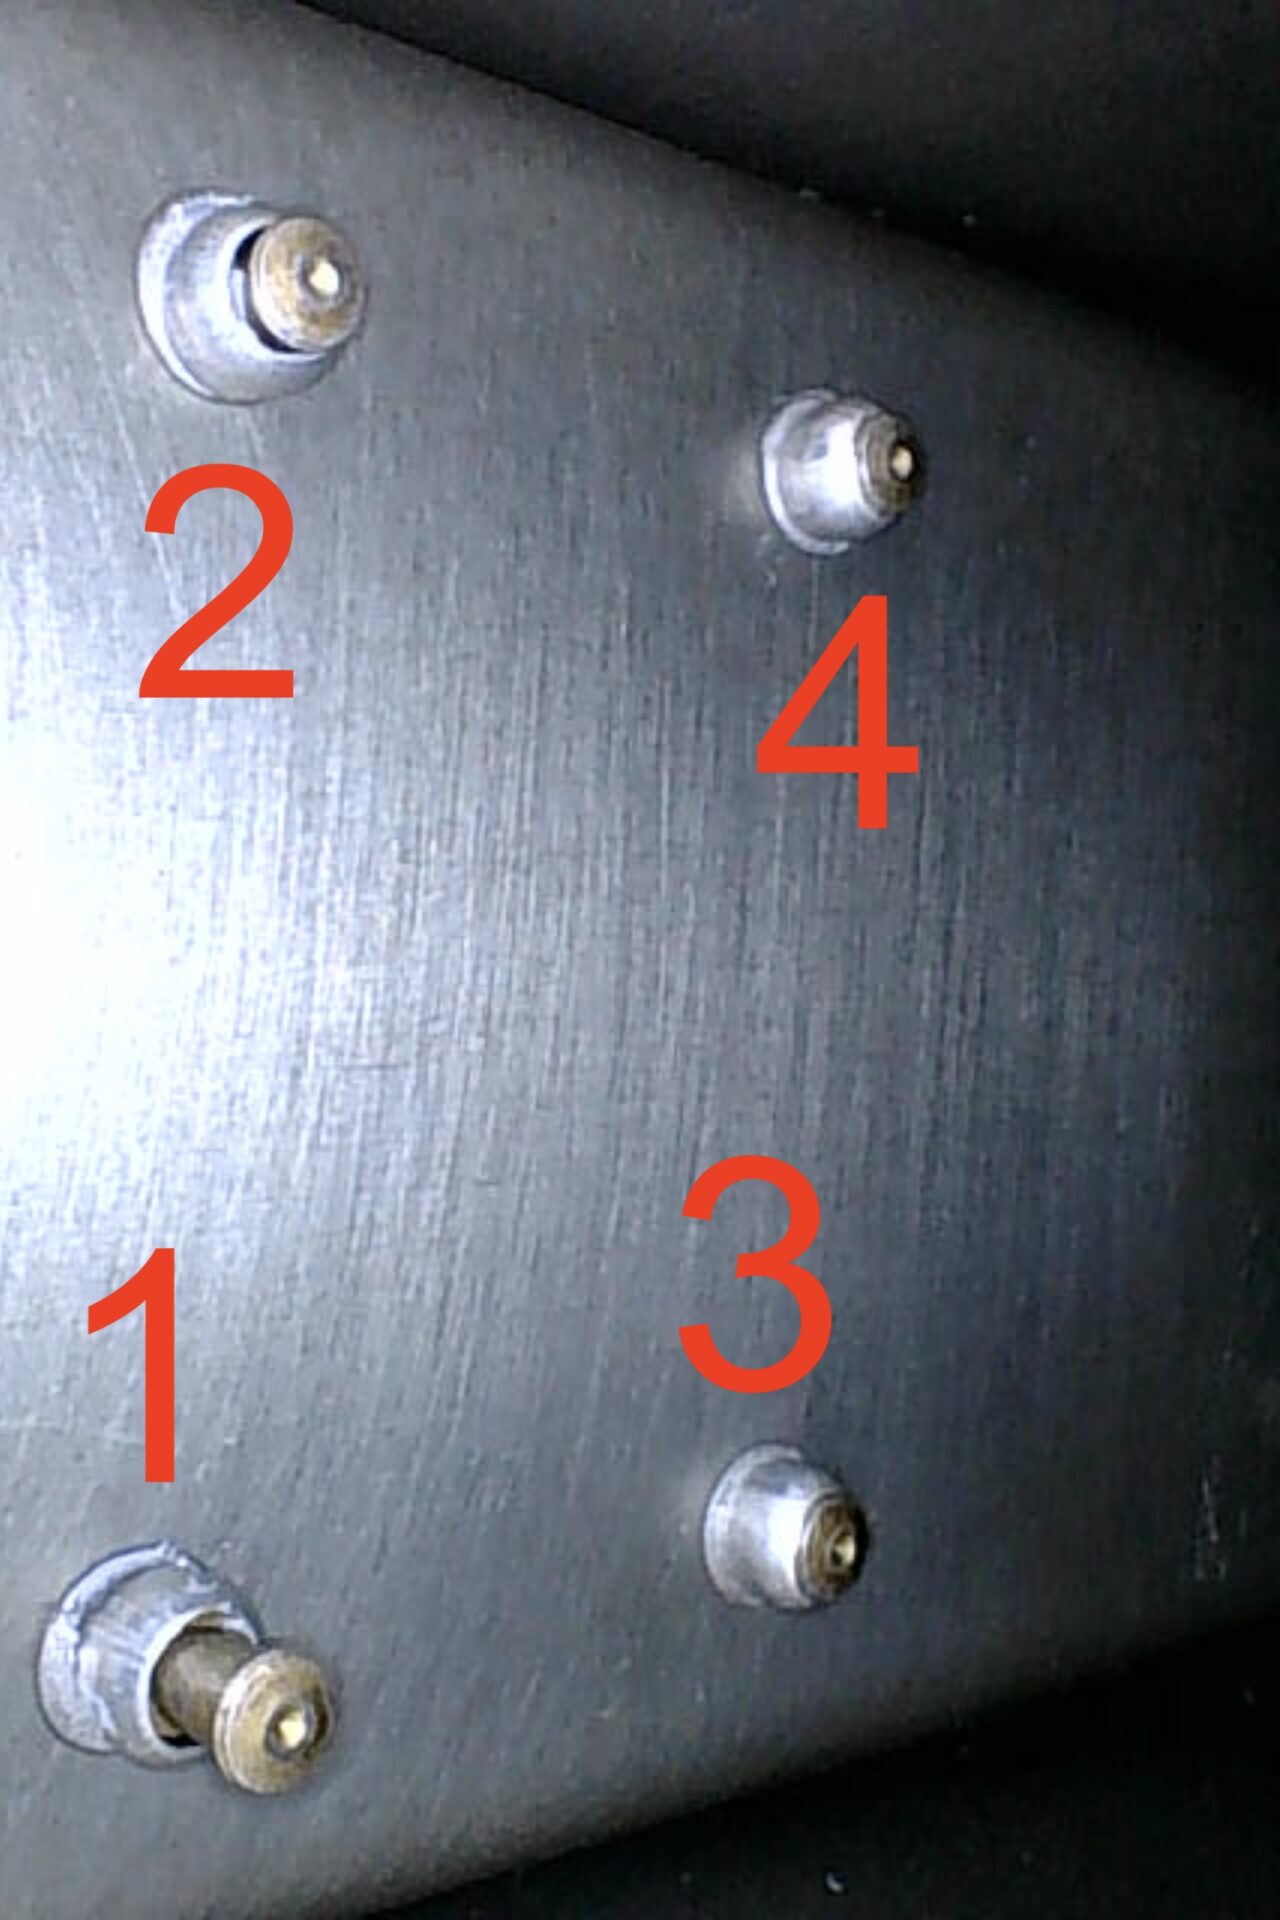
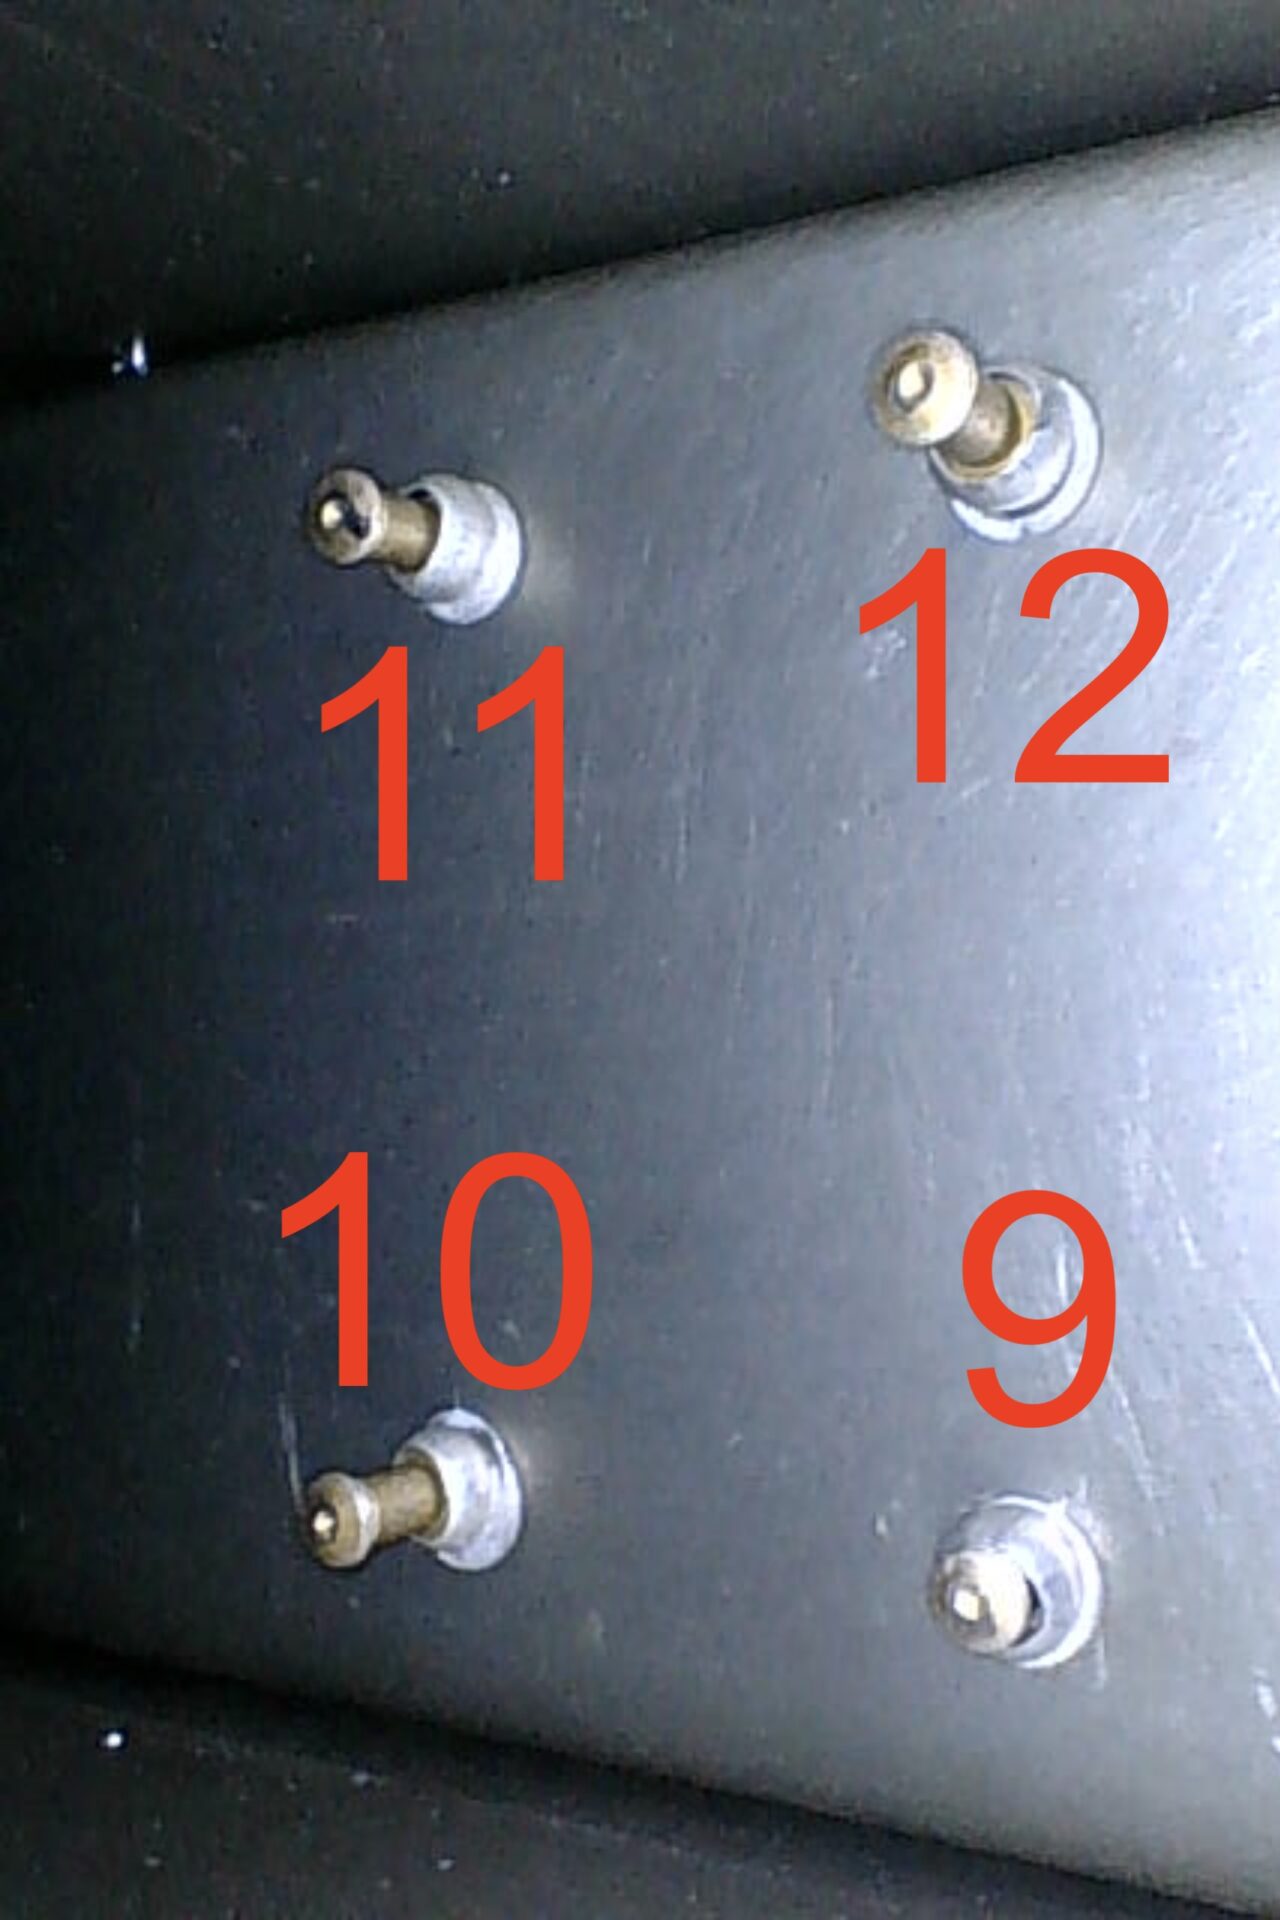
2,3,4 and 9 rivet shop heads look just right…
…while 1, 10, 11, 12 may need to be redone. We’ll see on Monday!
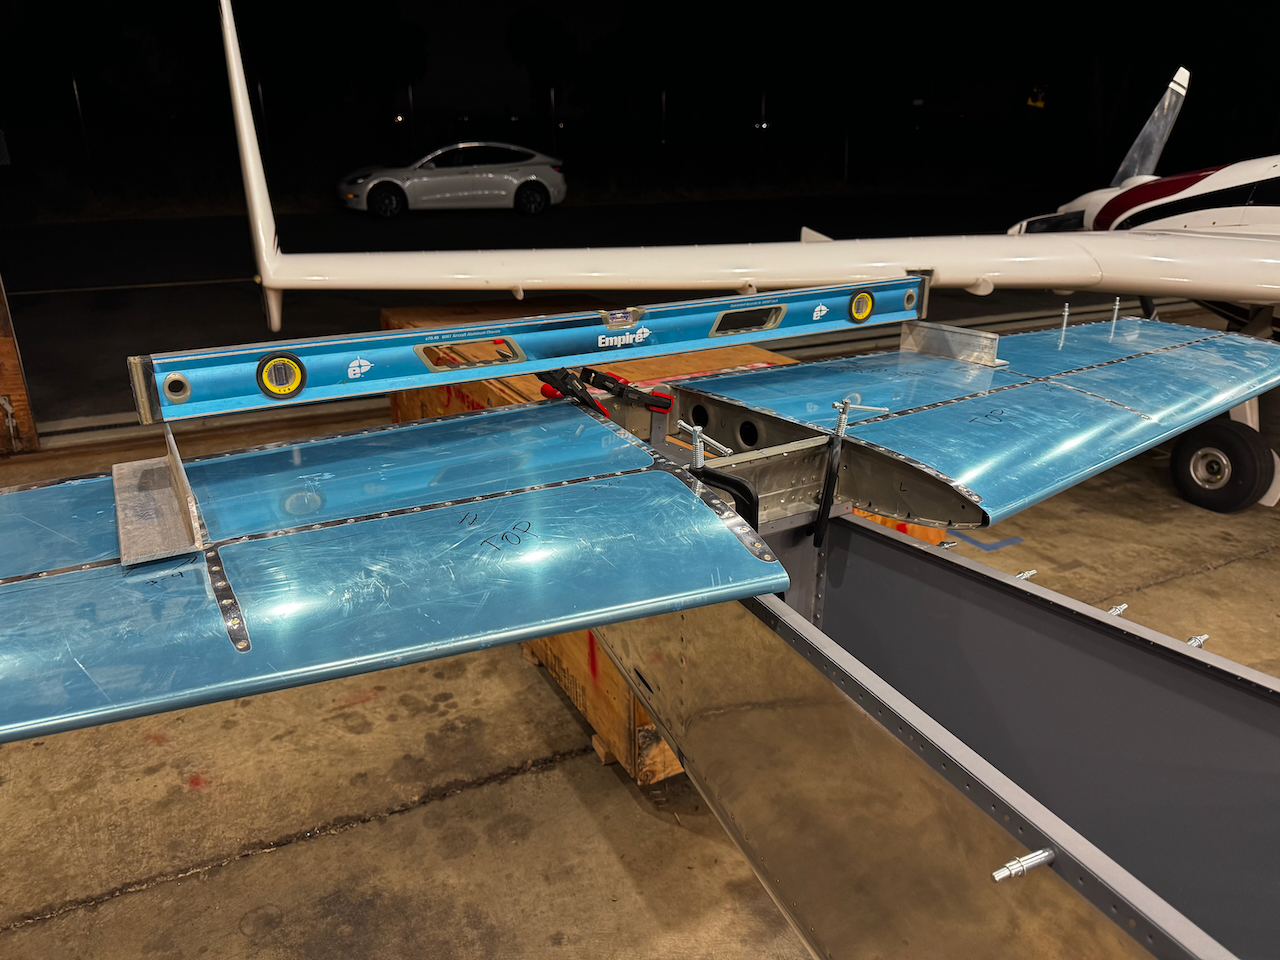
OK! With as much of the SB-0036 work done as possible, I moved on to the main event… the Horizontal Stabilizer! The plans call for fulling leveling the fuselage laterally and longitudinally. Then temporarily mounting the HS, leveling that, and double checking everything before drilling. Once you drill… that’s the HS you’re gonna have. It was quite an intimidating idea, but I just dove head first in.
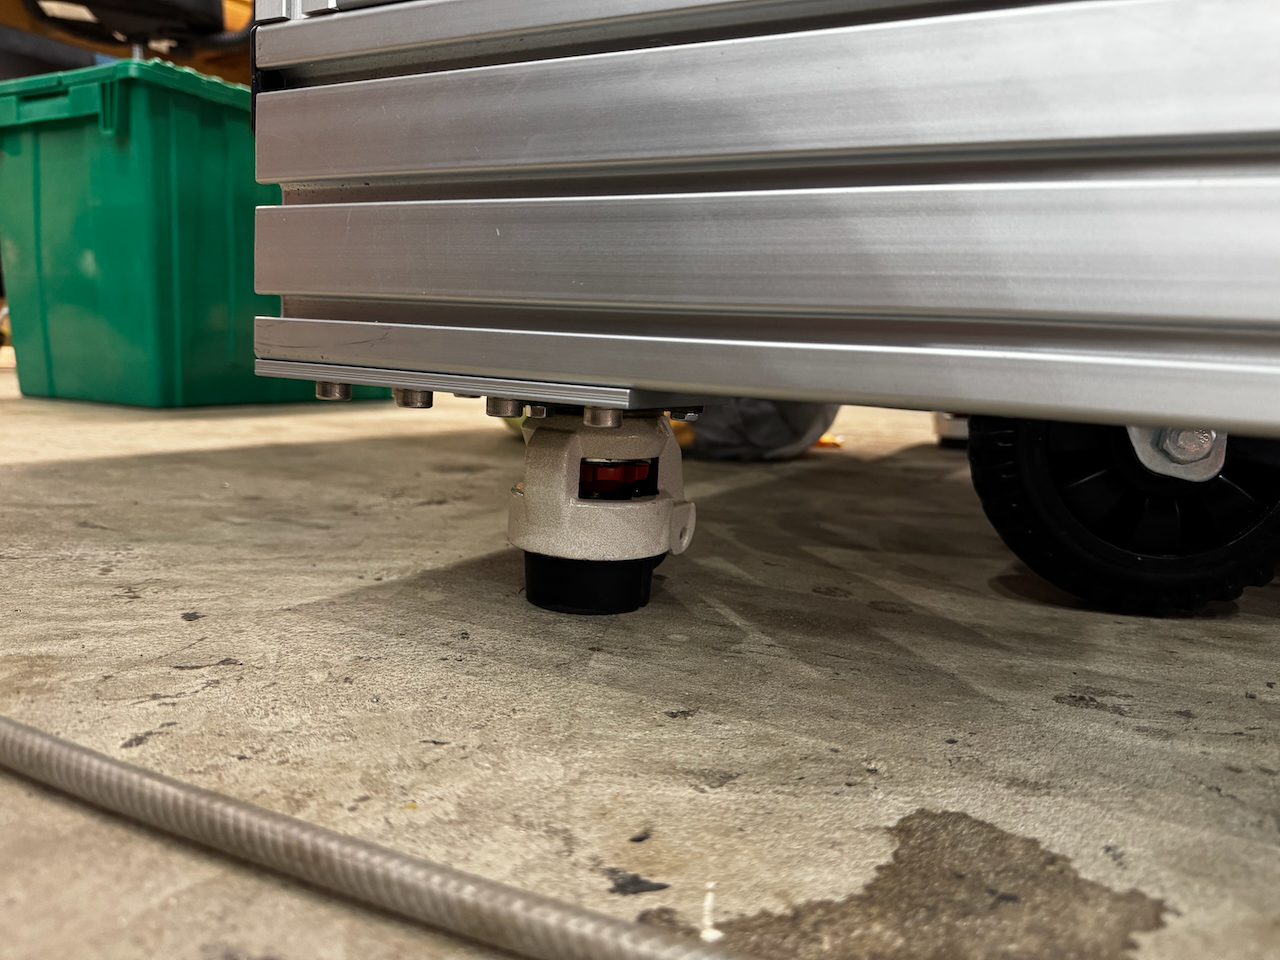
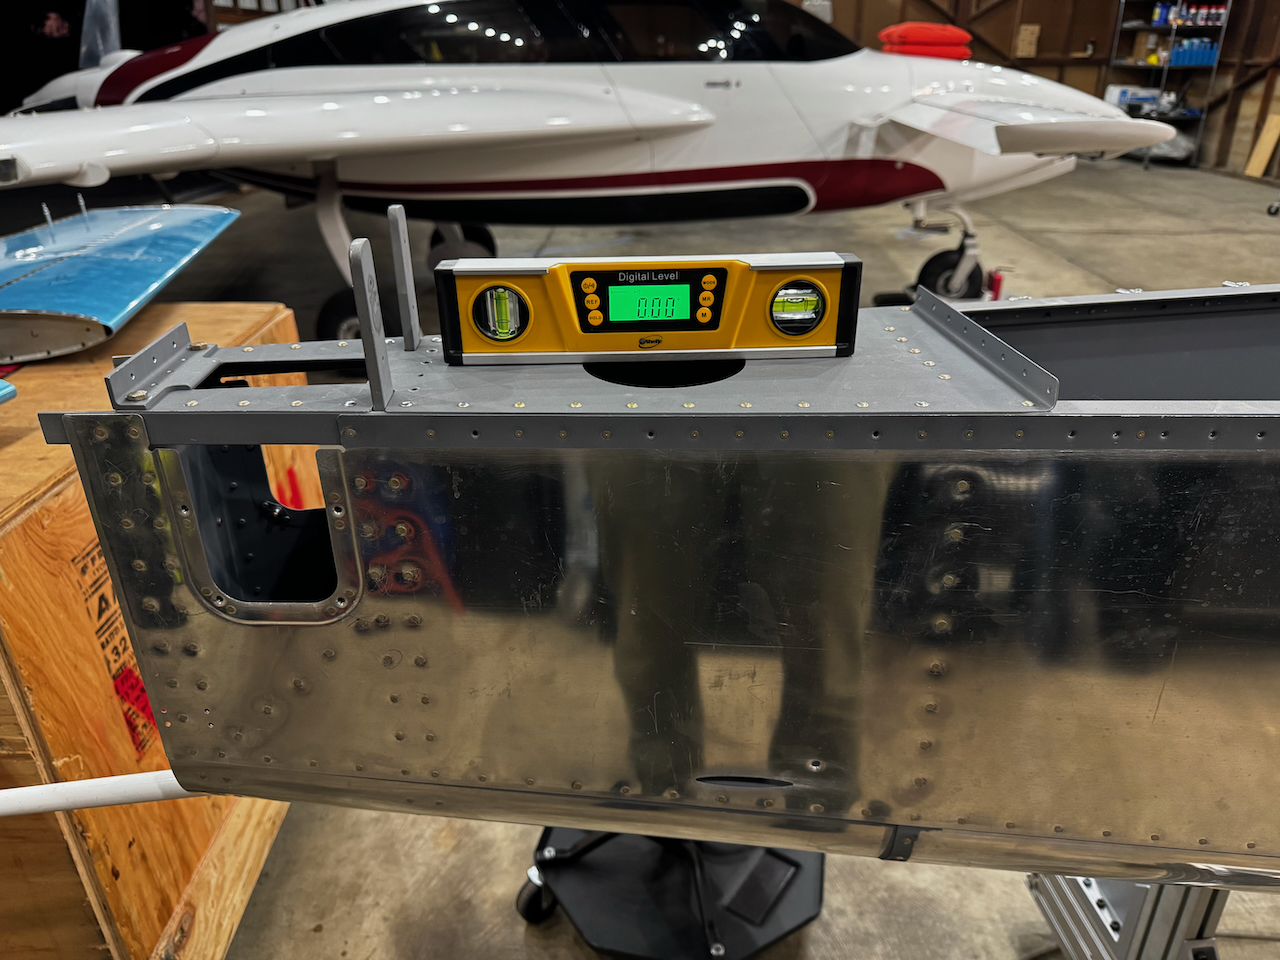
The fuselage stand we built really paid dividends with the effort of leveling the fuselage. I was able to laterally level using the caster feet. And using the sliding cross brace for the tail, I leveled longitudinally. Once challenge was how I was going to manipulate the caster or cross brace while also seeing the level? Well…. why see when you can hear! I’ve got an electronic level that beeps at you when it’s level. Cool.
Pretty darn close without any adjustments
caster footing that can raise quite a bit.
Perfect!
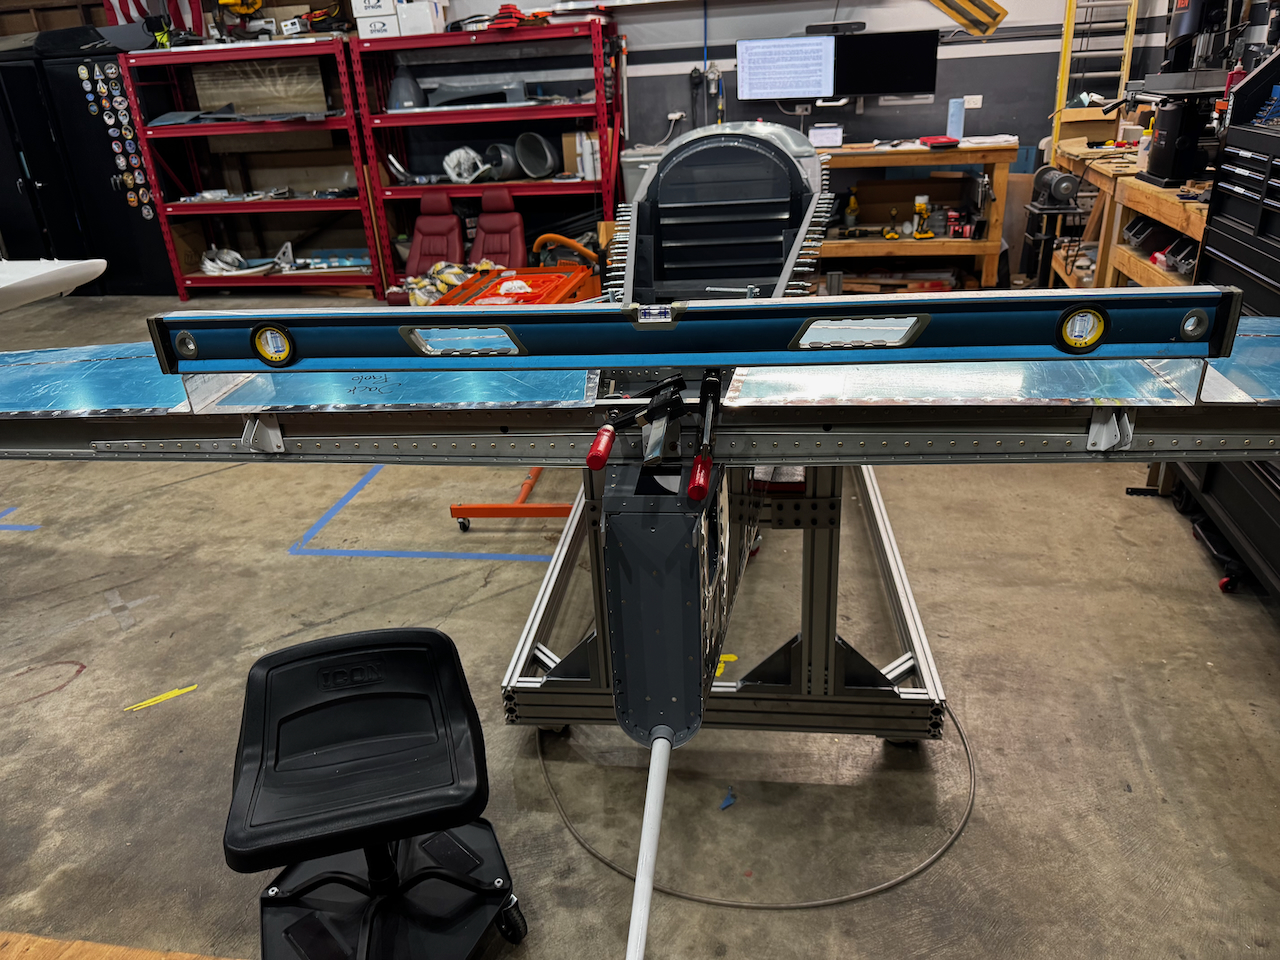
Longitudinal leveling was no problem.
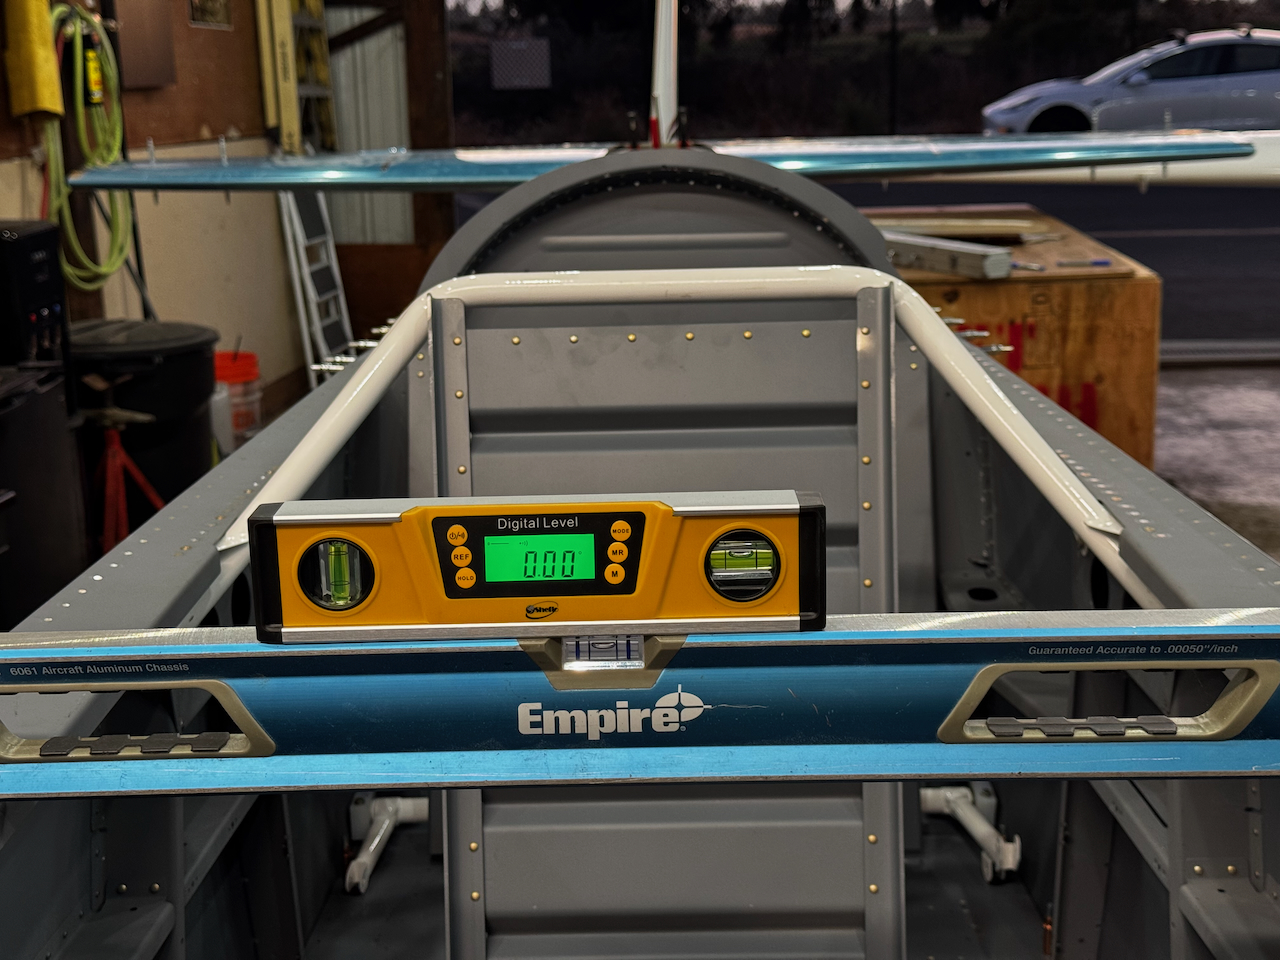
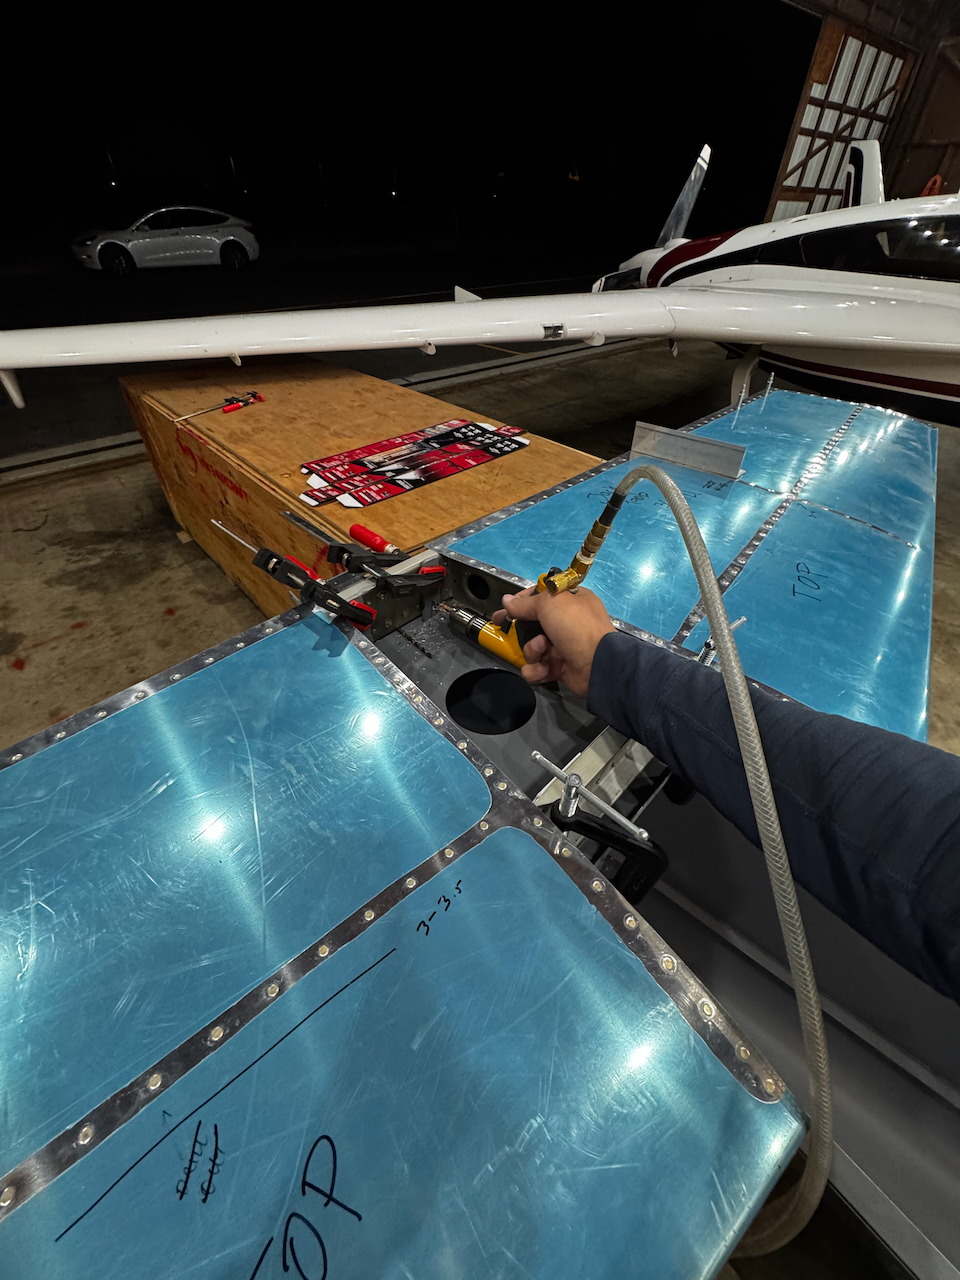
With the fuselage level, I shimmed the HS as per plans, and after measuring level (with a few tweaks to get it just right), it was time for the big drill! Very anti-climatic in the end, but fun none-the-less.
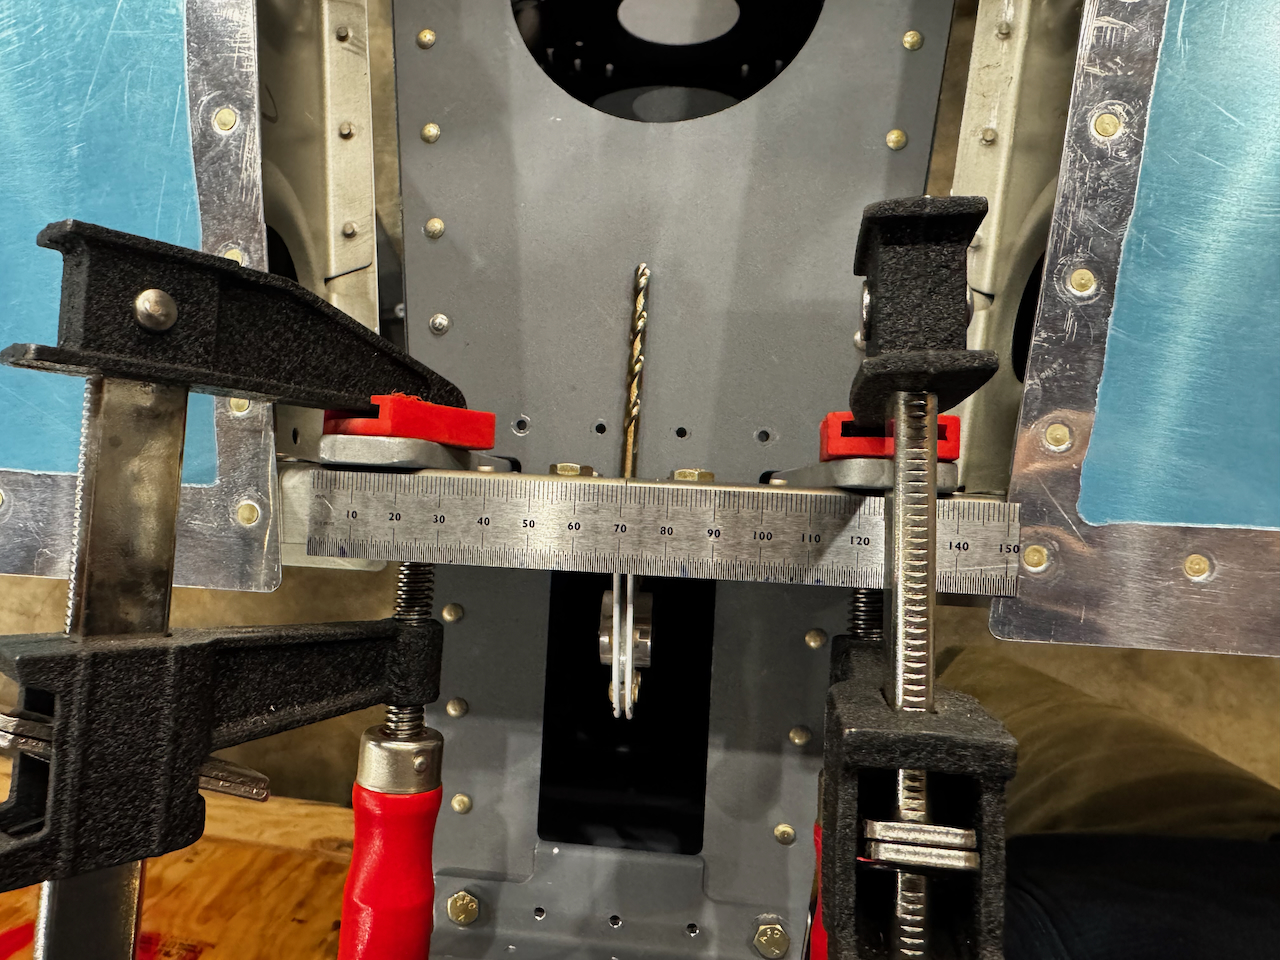
Yes… that drill bit is called out for spacing the rear spar. Note the ruler to find center between the stab bars.
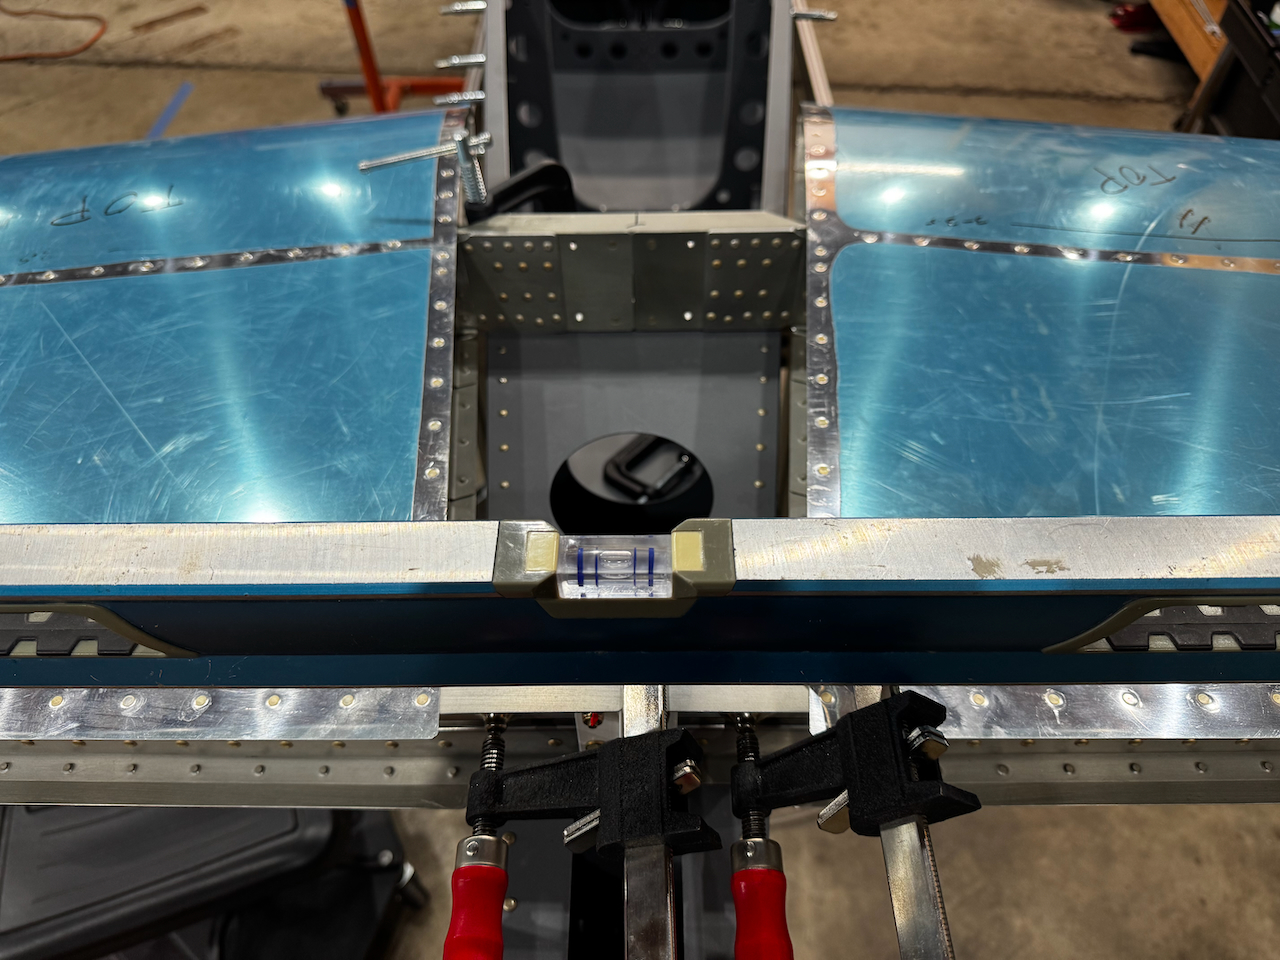
leveling is measured against two same height blocks.. in my case, angle.
looks good after a few tweaks!
double check fuselage and HS are both showing level before it’s too late!
and DRILL TIME!!!!!
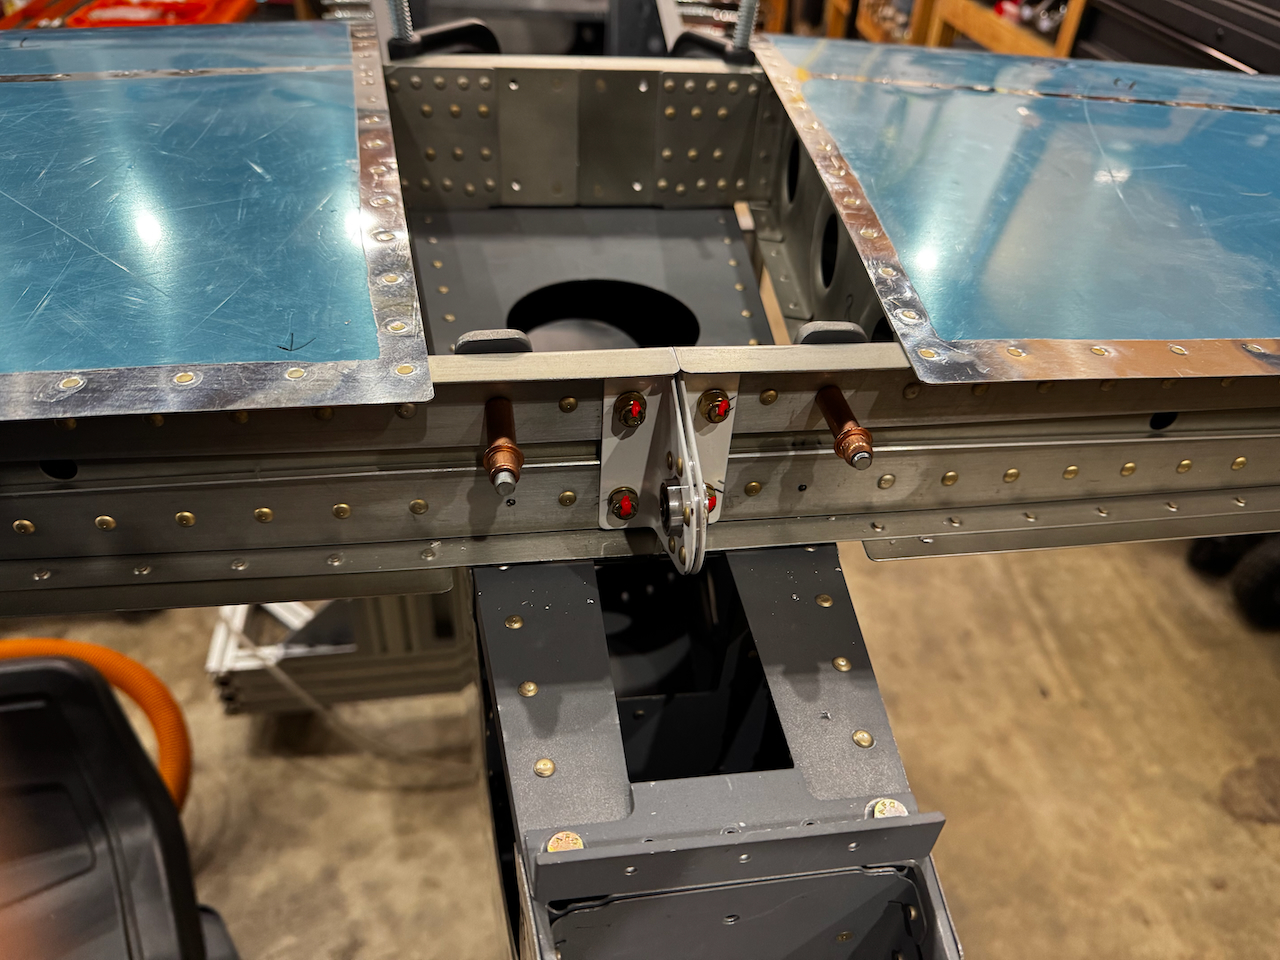
Rear spar now match drilled to the Stab Bars. Cool.
And that’s a wrap! HS should be level for good now. Next up will be squaring the HS before drilling the front bracket. Then it’s Vertical Stabilizer time! Until then…. Happy Building!


2 comments
I am so pleased you covered this SB. As I have been working out how to do it!
Fantastic progress. What a thrill to see the signatures